Finally got some time to put together a little DIY guide for some quick things you can do under the hood. Some of the pics look a little blurry, sorry about that - camera went stupid on some of the pics, now rectified for future pics (i.e., camera in trash now). NOTE that my engine garnish is removed in all the pics. If you have your plastic engine cover on, you will need to pry off the two threaded clips in the rear and the two acorn nuts (10mm) in the front. Careful that you remove the rear clips with even pressure and a turning motion - or they will break on you (I've already broken both of mine - no big deal). All these repairs were done with the engine cold - no sense doing anything when the engine is hot, just let everything cool down - do it over a weekend, etc.
Stuff mentioned below will take less than 30-45 minutes to complete for an average DIY - a good chance that most of the time will probably be spent looking for tools. Other than replacing the sparkplugs (cap and rotor on some models, plug wires) - these usually provide the little extra bit of maintenance (usually missed by many) that especially helps idle quality, reduce chance for hesitation from low speeds. Some will not apply for all models - do not attempt if you are unsure or lack appropriate tools. If in doubt, take it to a reputable shop.
As with any work on the car, especially around electrical sensors. It is generally safer to disconnect the negative terminal of the battery. Use a rag or similar to protect the exposed end of the battery - to prevent accidental discharge with the hot side or inadvertent reattachment of the negative terminal. This will also "reset" the ECM, making the most use of your cleaning attempts. Allows the ECM to get used to the cleaned sensors more quickly. Make sure you take the proper precautions when disconnecting power - many aftermarket and OEM anti-theft systems will be affected, sometimes in a very undesireable way.
Some topics that are covered - many of which were mentioned fairly recently on the forum:
- Cleaning the Throttle body on car - minimum type of service that I would recommend on a throttle body. Better to take the throttle body off the engine to clean, but that is a little more involved that some would like to get + not really necessary if you routinely clean the throttle body. This shows the typical accumulation over a 30K mile period for my car.
- Cleaning the MAF/IAT sensor (Mass Air Flow meter and Intake Air Temperature sensor). This will apply to North American market Corolla model years from 2000+. Previous model year 8th gen Corollas (1998-1999) and the majority of the earlier generations are MAP based (Manifold Absolute Pressure), there is no sensor that can be cleaned. Again, this shows the typical accumulation over a 30K mile period for my car.
- A quick look at the PCV (Positive Crankcase Ventilation) and its location on the engine.
- Lastly, a look at the OCV filter on the VVT-i equipped engines. This would also apply to any Toyota corporate models that have VVT-i - including Camrys, Celicas, 2000+ Corollas, etc. A clogged filter here is the leading cause of excessive valvetrain noise on the 1ZZ-FE engine with VVT-i, but not the only cause. If you noticed a steady increase in noise, loss of power, VVT-i malfuction (P1656 OCV Circuit Malfunction, P1349 VVT System Malfunction) - a clogged filter may be the cause. I've seen some filters come out clean, some completely packed with particulates. You can also clean the OCV valve itself in a similar manner - but I will leave that to another DIY. The chance of damaging the valve is non-zero - I would rather see people clean the filter than try and wrestle with the OCV valve - talking a $5 part (filter) vs a $200 part (OCV valve). Which all could eventually lead to a VVT-i actuator failure, a $500+ part.
================================================================================
On car, quick, throttle body cleaning - what you will need:
- Phillips-head screwdriver (for hose clamp)
- Flat-head screwdriver (for stubborn electrical connections)
- Flashlight (optional) to address the level of deposits inside the throttle body
- Old toothbrush and clean rags (NOTE check that toothbrush bristles will not dissolve in solvent - don't want to add trouble.
- Appropriate solvent (make sure it says throttle body cleaning, sensor safe)
https://img.photobucket.com/albums/v620/fis...MAF/Solvent.jpg
WHAT and WHERE:
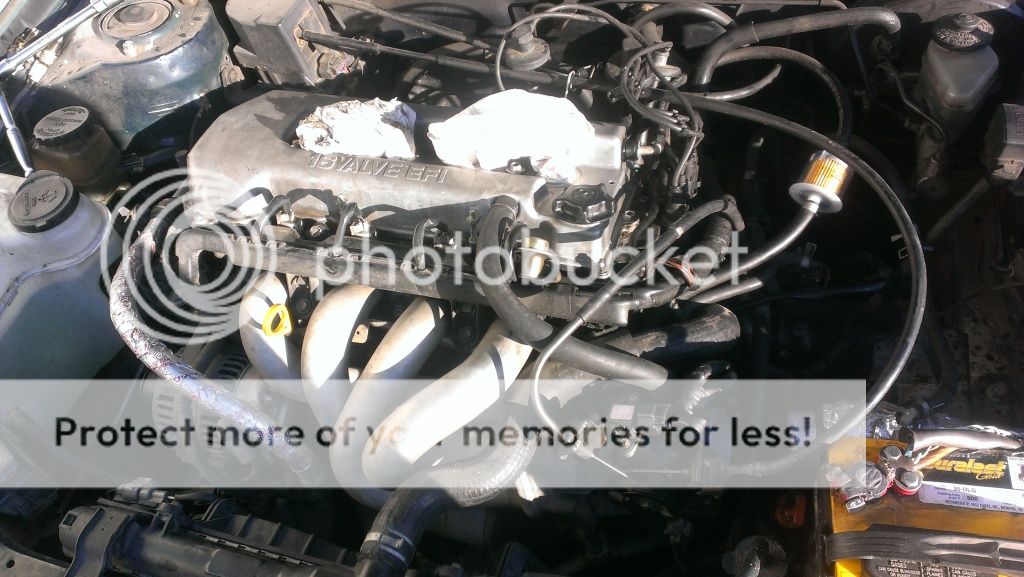
First quick overview of some common components. Most of you should know where these bits are - but some might like to see some pics.
https://img.photobucket.com/albums/v620/fis...verview_top.jpg
https://img.photobucket.com/albums/v620/fis...erview_side.jpg
https://img.photobucket.com/albums/v620/fis...F/TB_marked.jpg
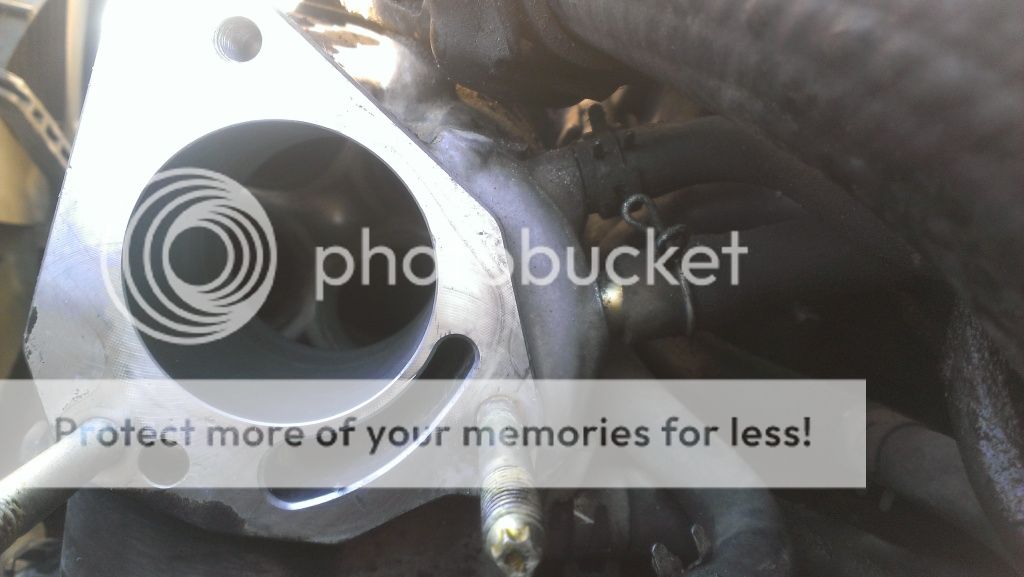
Location of the screw on my 2002 - most should be in a similar place.
https://img.photobucket.com/albums/v620/fis...MAF/TB_band.jpg
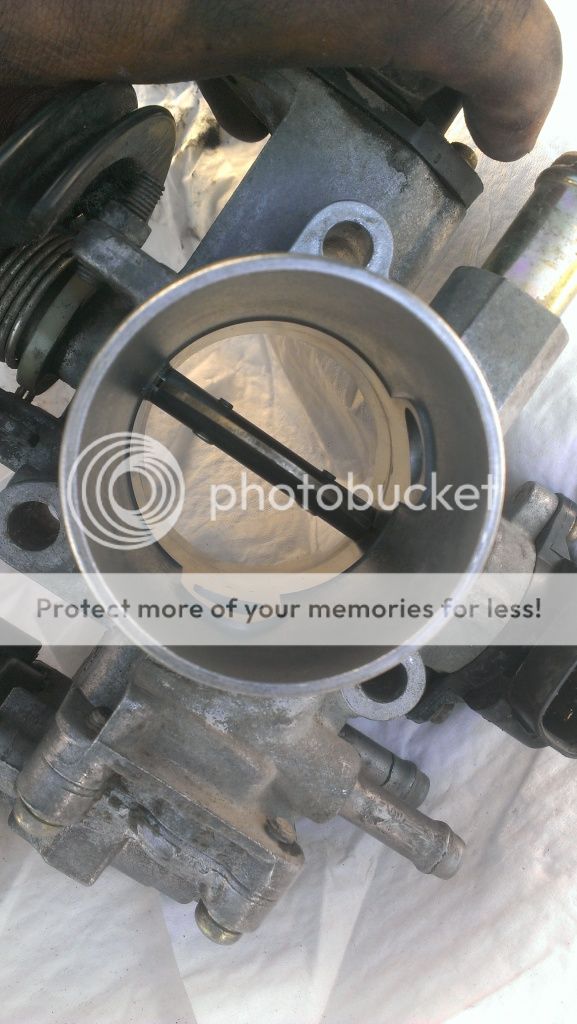
Look at the throttle plate and the mouth of the throttle body. That is what you will want to be cleaning here. Note where the carbon / varnish deposits are.
https://img.photobucket.com/albums/v620/fis...close_dirty.jpg
https://img.photobucket.com/albums/v620/fis..._open_dirty.jpg
HOW:
First, need to pull the airbox cover to gain access to the throttle body. Disconnect the electrical connectors on the airbox - the VSV connector for canister closed valve, the EVAP air hose (vacuum hose - can be really tough to remove, just becareful, don't want to snap off the plastic nipple here), the MAF meter connector (you can leave both sensors attached to the airbox lid for now). Loosen the hose clamp, on the throttle body, unlatch the two forward clips on the airbox cover - angle upwards, wiggle the hose loose from the throttle body, and pull the whole assembly out.
Now you should have a pretty good view of the throttle body. Cleaning can be handled a couple of ways. One is to spray the solvent into its cap - providing something that you can "dip" the toothbrush or rag into - then apply liberally in, on, and around the throttle plate. The toothbrush helps, because its length can help reach a good bit past the throttle plate.
The other is to liberally spray down everything inside the TB and start scrubbing away at the stubborn spots. Solvernt spray is pretty strong - should be able to clean off a good portion of light carbon and varnish there - but some of the cavities might have to be scrubbed out by the toothbrush. Can always combine the two methods - spray first to loosen and soften the deposits, scrub to dislodge stuck bits, repeat for stubborn spots.
Articulate the throttle plate by rotating the throttle control arm on the outside of the throttle body. Just turn the cam-like mechanism attached to the cable to open the TB. While it is open, spray and srube immediately behind the plate. Don't forget to work all the way around the circumference and the now exposed, backside of the plate. For models with DBW (Drive-By Wire) - 2005+ Corollas, DO NOT attempt to move the throttle plate with the ignition (throttle body) powered on or damage to the throttle body will occur.
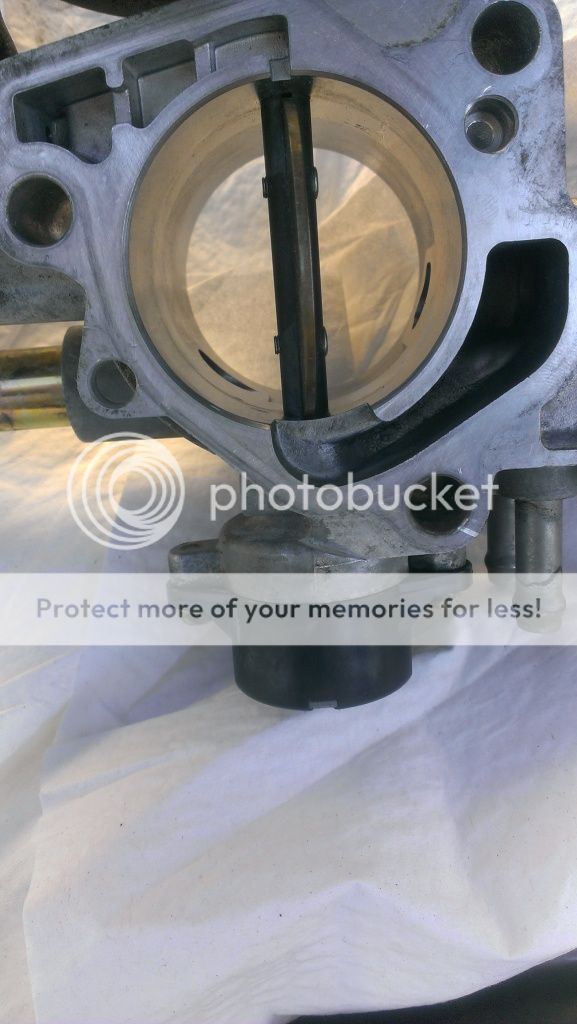
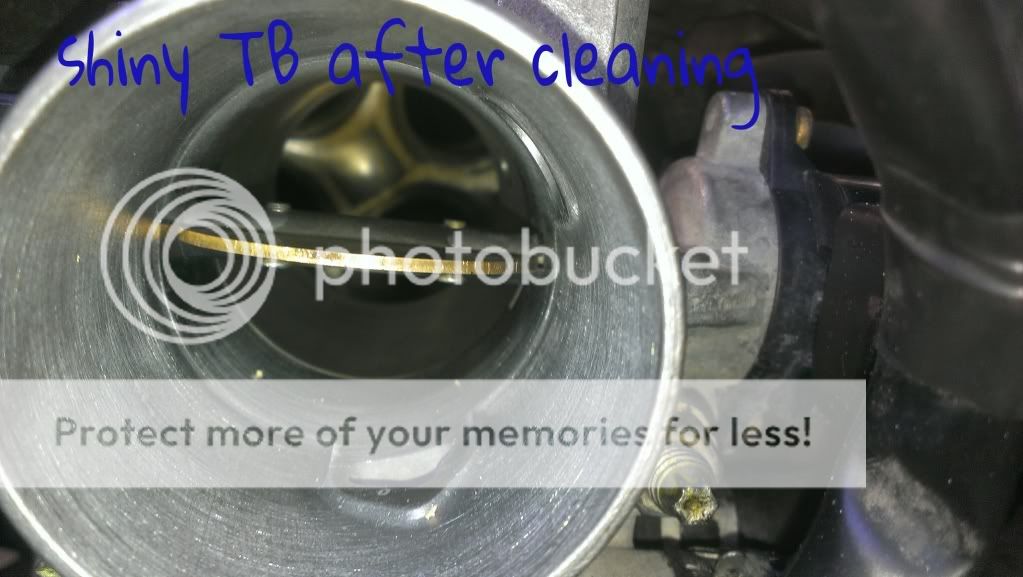
Here is what the TB looks like aftera few minutes of scrubbing and spraying. Allow the solvent to either evaporate on its own or blot up the larger pools of left over solvent with the clean rag. Becareful not to introduce foreign matter into the induction system. Allow everything to air dry as much as possible, the reinstall ductwork. If you want, you can take the time to clean the MAF sensor - while that is air drying, the throttle body should be close enough to being dry. If there is excessive solvent left in the induction system - the car will just burn it off. Unless you emptied the contents of the entire can into the intake - the chance for hydrolock and engine damage is very remote.
https://img.photobucket.com/albums/v620/fis..._open_clean.jpg
================================================================================
MAF sensor cleaning - what you will need:
- Phillips-head screwdriver (for MAF sensor - two screws, don't lose them)
- Flat-head screwdriver (for stubborn electrical connections)
- Flashlight (optional) to address condition of wires
- Appropriate solvent (I used my throttle body cleaning solvent, brake cleaner works great too - as long as it is non-clorinated, the also make MAF sensor specific solvent)
QUICK LOOK:
Close ups of MAF sensor (sensing wire) and IAT sensor
https://img.photobucket.com/albums/v620/fis...F/MAF_close.jpg
https://img.photobucket.com/albums/v620/fis...F/IAT_close.jpg
HOW:
There is no set cleaning interval for the MAF sensor - it is not even considered a serviceable part. But many have had good results with cleaning this sensor.
To remove the sensor - pull the electrical connector off (disconnecting power first is generally a good idea). Unscrew two gold phillis-head screws from the corners of the MAF sensor. May have to bend the cruise control stay to allow enough room to pull the sensor out. Looking downwards into the sensor - the sensing wire and heated wire should look "shiny" and clean. Do not be tempted to physically touch the wires (some use Q-tips to clean them) - I prefer to use the solvent spray only. If the wire won't come clean with pressure from the solvent, then replace the sensor, as it is too easy to damage the little wires in there. Worse case, you'd have an intermittent connection - which would mean headaches down the road. But if you are able to spray the wires clean - you just saved yourself about $70 aftermarket, about $100-$130 retail. The IAT sensor on the MAF body is pretty tough - should have a deep amber color to it when new - just make sure there is not debris or oils on its surface. Make sure you don't lose or damage the thin rubber o-ring at the base of the MAF sensor - otherwise, it could cause a leak in the airbox, pulling unfiltered air into the induction system. Allow to air dry and replace into airbox cover.
================================================================================
PCV cleaning - what you will need:
- Elbow grease, maybe pliers for stubborn hoses.
- a 22mm wrench or socket (tighten to 20 ft.lbs)
- Appropriate solvent (same stuff as cleaning the MAF sensor)
QUICK LOOK:
Close ups of PCV valve - location is on the driver's side of the car, rear part of the valve cover. Can't miss it.
https://img.photobucket.com/albums/v620/fis..._close_open.jpg
https://img.photobucket.com/albums/v620/fis...V_close_end.jpg
HOW:
Like the MAF sensor, there is no set cleaning interval for the PCV valve - again, not even considered a serviceable part, very inexpensive - easy to replace. But again, many have had good results with cleaning this part.
Locate the PCV in the valvecover. Grasp the wire hose clamp, squeeze the ends and slide down and out of the way. Carefully rock the rubber cable back and forth until it starts to turn - should slip off easily at that point. Take a 22mm socket or wrench and loosen it from the valvecover - might take quite a bit of force, if this has never been changed before - OEM really wrenches it on there tight.
Once removed from the valvecover, note is an excessive amount of oil is dripping from the valve end or drips out of the PCV hose running to the throttle body. A little bit here is normal, but if oil is pouring out of the hose or valve - could have several issues you need to address soon. If everything looks OK - give the PCV a good shake - it should "rattle", indicating that it is freely moving inside. The valve is basically a one way check valve - it allows gases from the valvecover to vent infront of the throttle body, to be burned off during normal operation (this is also why the throttle body can get pretty filthy). But air is not allow to pass from the intake towards the valvecover. This allows normal combustion blowby to be vented outside to prevent overpressurizing the crankcase. Too much pressure will cause oil leaks to form. Even if the valve "rattles" - I like to give it a good spray of solvent inside and out. You'll be amazed by how much oil and carbon deposits this can hold. Once clean, allow to air dry, and replace.
https://img.photobucket.com/albums/v620/fis...V_close_end.jpg
================================================================================
OCV filter cleaning - what you will need:
- Extra set of hands, may need to remove intake manifold and/or alternator to get more room to work with
- Piece of wire or hemostats (tweezers) to fish the filter out, if the filter doesn't come out with the bolt
- a 14mm wrench or socket (tighten to 21 ft.lbs)
- Rags or papertowels to sop up the oil that will drip out of the head.
- Appropriate solvent (I used throttle body cleaner - becareful, as the filter body is partly made of plastic)
QUICK LOOK:
Pics of the location of the OCV filter, dirty (but clean) filter, and cleaned filter and bolt. Note that the filter has prongs that slid into the top of the bolt. May or may mot come out of the head as a single piece - more likely, it will be separate and be a PITA to pull out.
https://img.photobucket.com/albums/v620/fis.../OCV_filter.jpg
https://img.photobucket.com/albums/v620/fis.../MAF/filter.jpg
https://img.photobucket.com/albums/v620/fis...lterandplug.jpg
HOW:
Locate the filter bolt, and remove with a 14mm wrench or socket (socket might tight, unless you have a low-profile version). There is a thin metal gasket that might be stuck to the bolt - make sure you keep that, don't damage it if you didn't but a new one (most can be reused). Remove filter (very delicate - pretty small filter with a plastic body (metal screen). Clean it throughly with solvent of choice. Spray in rag or paper towel, if you have a parts washer or small parts cup, let is soak a bit and see if there are any "chunks" in there. Once clean, clean the bolt, gasket, mating surface on the cylinder head - reassemble the filter onto the bolthead - carefully insert it into the cylinder head. If the filter falls off - you run the risk of crushing the filter with the bolt. You can use a little dab of grease to hold the filter on - grease will dissolve in the oil quickly. Tighten up the bolt to the recommended torque rating, start car. Don't be alarmed if a CEL is set - as there might be a momentarily loss of oil pressure to the OCV valve (a little bit of oil drained out when you removed the filter - I lost a few ounces of oil). Reset the ECM - let the car relearn some settings - should notice if the noise is diminished or not. Since mine wasn't dirty - I didn't notice any noise change. Others have experienced a revalation in noise reduction - might be worthwhile for a few minutes of you time to see if you can knock out that ticking noise.
 Thanks for the info

 ...)
...)
